The first step in creating a project template is to create a new project. Once the project is created, you should ensure that you have everything defined the way you want it within the template. Check to be sure you have the following items configured for your use:
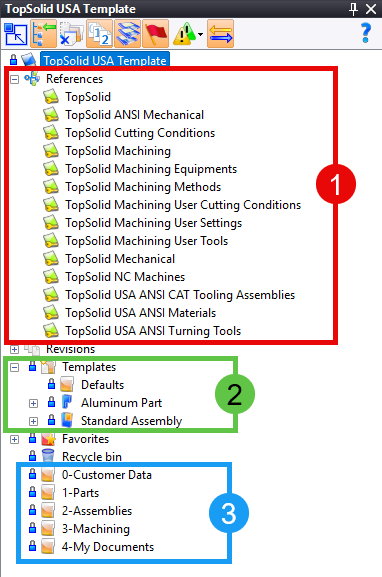
- References
- This gives quick access to specific libraries for this project
- Templates
- Feel free to create any TopSolid document template that would be reusable within your project.
- Folder Structure
- Keeping yourself organized is critical. Choose a folder structure that helps you do this. In our sample above, we named the folders with numbers so that we could control the order of the folders even!
Now that your template project is defined as you need it, you should check it into the vault as a best practice. To do this, right mouse click on the name of the project and choose check-in.
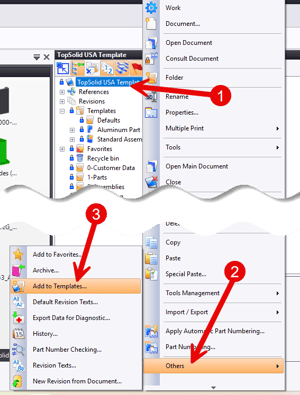
To set this project as a Project Template, follow these steps:
- Right-mouse click on the name of the project
- Browse all the way down to the "Others" Option
- Select "Add to Templates..."
 Next you will need to choose where to store the project template. Follow these steps:
- Select the My Templates location
- See note below
- Select Green Check
Close the template project by selecting the X in the top right corner of the project.
Note: If you are working with a server based PDM deployment, you will have the option to save it to the Server templates or to My Templates. The difference is that the Server Templates will make this template available to all users connected to the PDM server while the My Templates will make this template only available on your instance of TopSolid.
 To use your newly created project template simple click on the New Project icon in the home tab and then:
- Browse to and select your project template
- Give it a unique name
- Validate to create a new project based on this template